Picture a scene in a TV drama where two people sit facing each other in conversation. One looks from the left side of the screen toward the right, and the other looks from the right side toward the left. Even as the camera cuts back and forth between their faces, we never get confused about who is sitting where. Behind this effortless clarity lies a filmmaking convention: the “180-degree rule.”
Put simply, the 180-degree rule is the principle of “drawing an invisible line that connects the characters or the movement in a scene, and shooting only from one side of that line.” This line is called the imaginary line or the axis of action, and the rule forms part of the basic grammar of continuity editing, which lets the audience understand the space as a single, unified whole even as the shots change.
This article offers an easy-to-follow overview, starting with the concept of the imaginary line and moving on to the principles that keep screen direction and eyeline matches consistent, the problems that arise when the line is crossed and how to fix them, and finally the deliberate breaking of the rule as a directorial choice.
The 180-Degree Rule: The Invisible Line That Protects On-Screen Space
What Is the 180-Degree Rule?
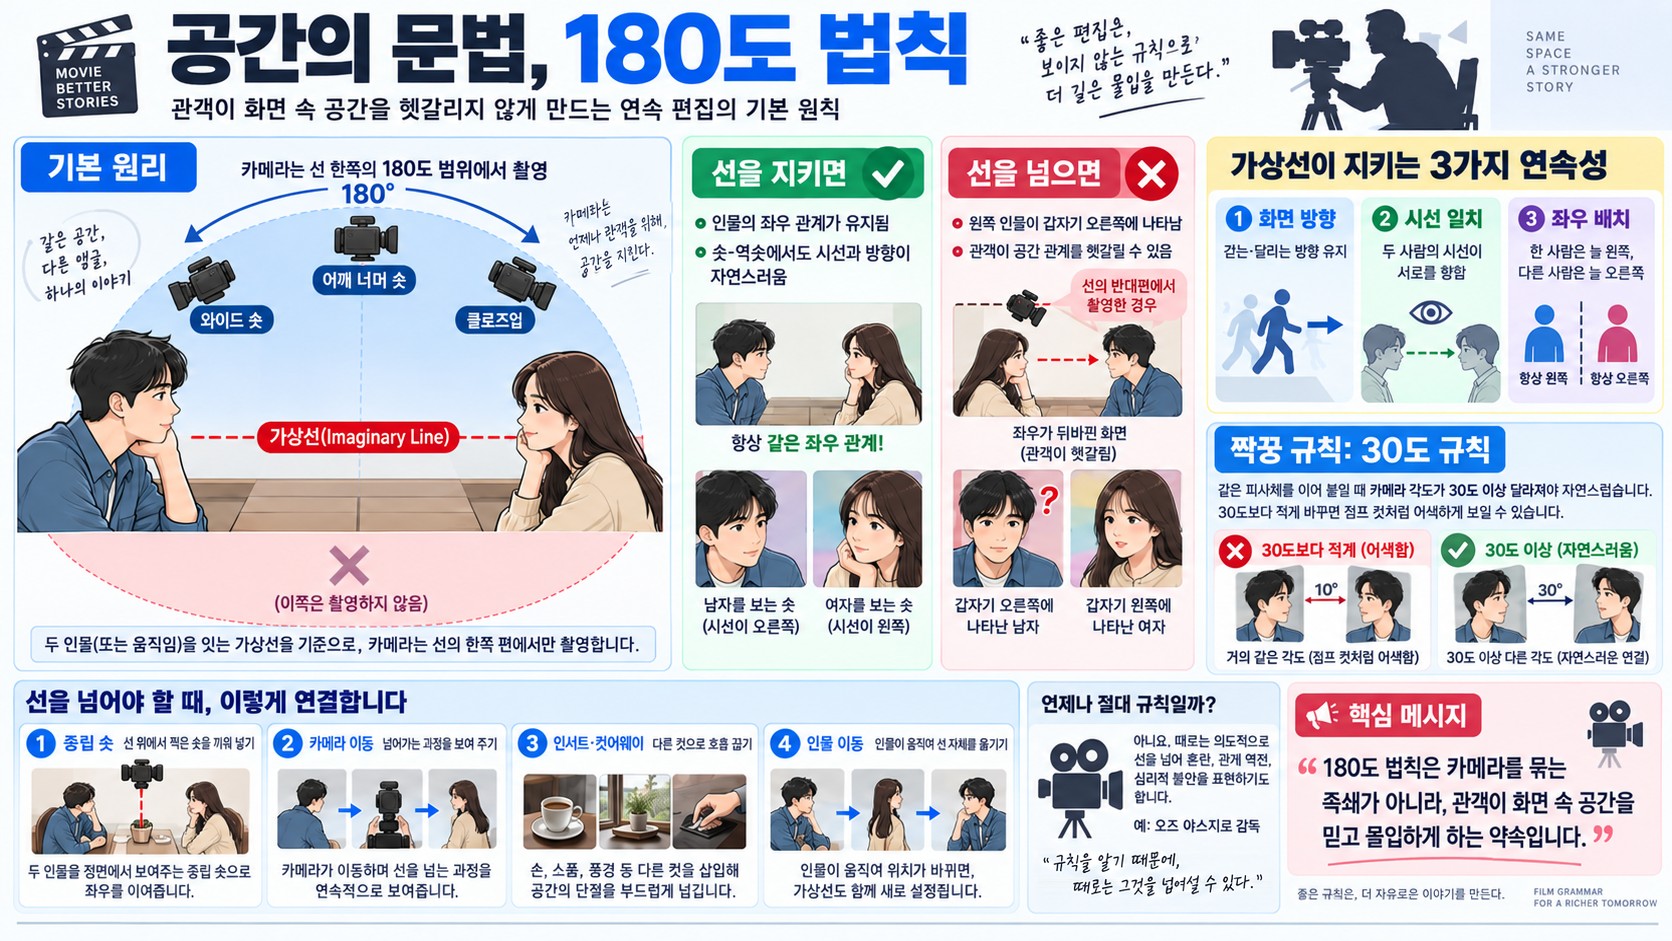
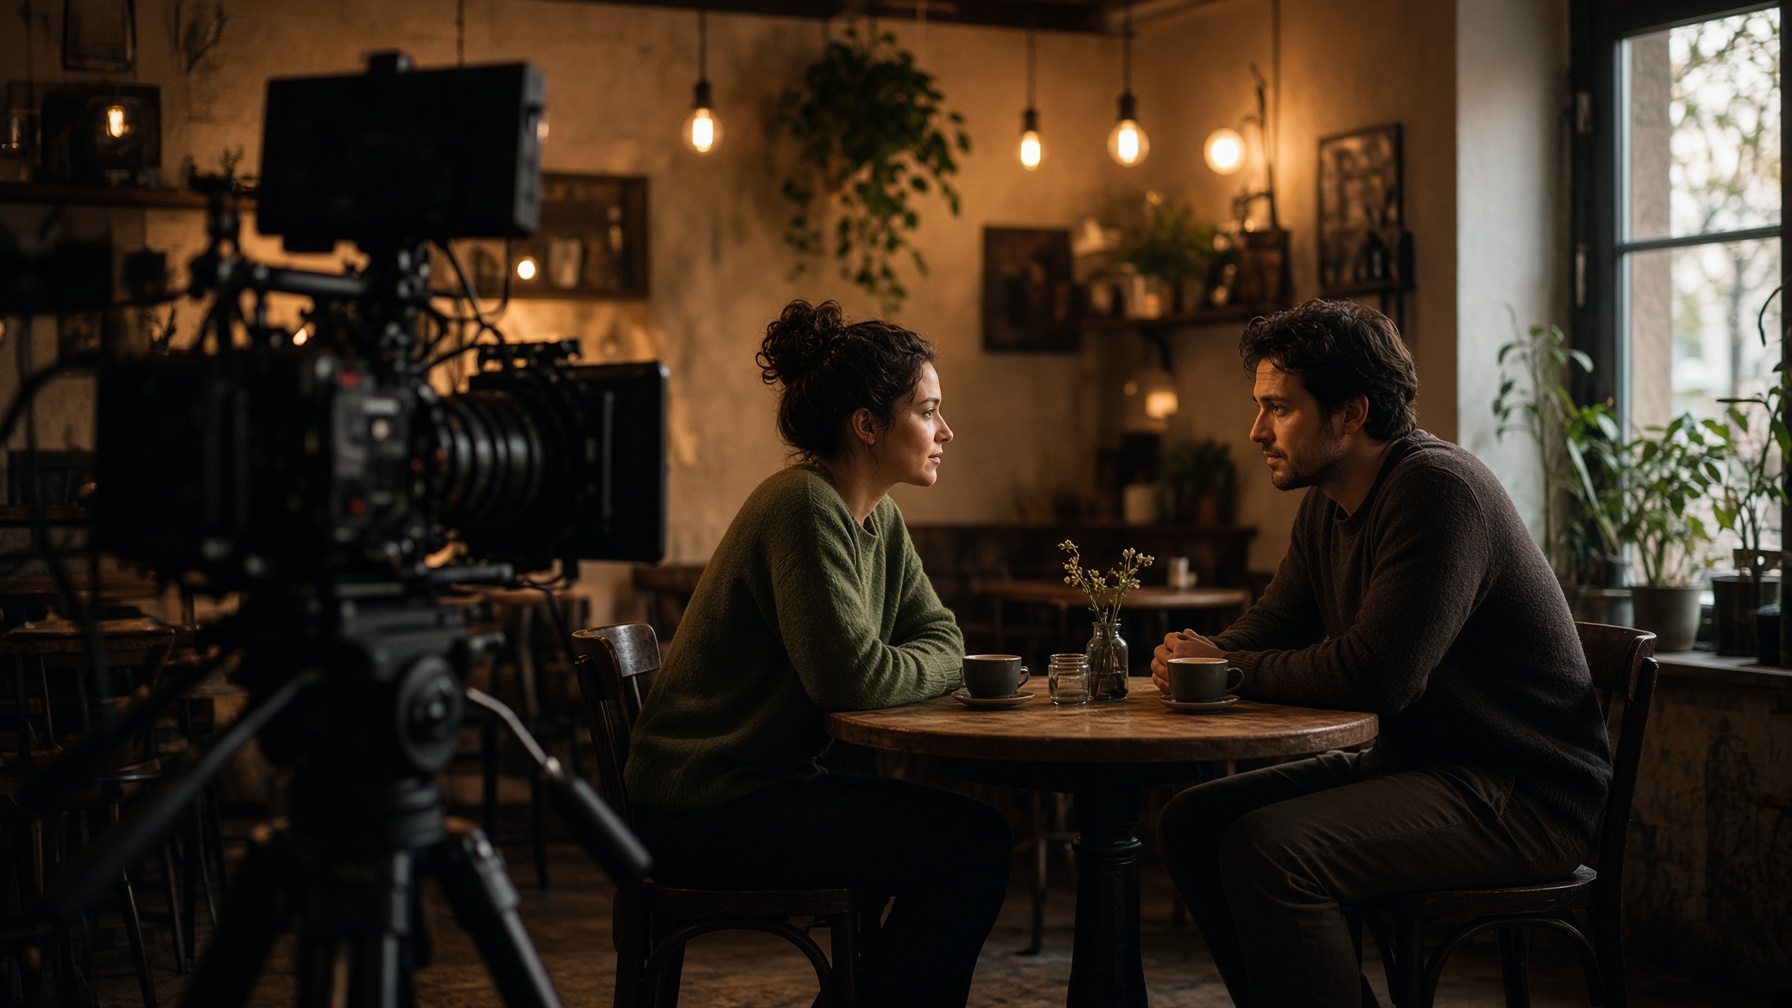
When two characters face each other, you can imagine a straight line connecting their heads. If you place the camera on one side of this line, the area in which the camera can be positioned forms a semicircle — in other words, 180 degrees. Within this semicircle, however you combine wide shots, over-the-shoulder shots, and close-ups, the characters’ left-right relationship stays exactly the same.
Conversely, if the camera crosses to the other side of the line, a character who was on the left suddenly appears on the right. The 180-degree rule is a core rule of continuity editing that has been refined since the era of classical Hollywood cinema to prevent exactly this kind of confusion.
- Imaginary line: an invisible reference line drawn along the direction of a character’s gaze or movement.
- 180-degree arc: the semicircular area on one side of the imaginary line within which the camera can be freely positioned.
- Shot/reverse shot: an editing technique that alternates between two characters in conversation; this is the kind of scene where the 180-degree rule is applied most often.
Three Kinds of Continuity Protected by the Imaginary Line

The imaginary line preserves three kinds of continuity that help the audience link space and movement into a coherent whole from one shot to the next.
(1) Screen Direction
A character walking from left to right across the screen must keep moving in the same direction in the next shot to appear to be continuing along the same path. If the direction suddenly reverses, the audience feels that the character is turning back. This is why chase scenes are shot with the pursuer and the pursued running in the same direction.
(2) Eyeline Match
When a character looks toward the right side of the screen and the shot then changes, the audience takes the next shot to be what that character is looking at. In a dialogue scene, the two characters’ eyelines must be matched so that they point toward each other; only then does it feel as though they are really facing each other and talking.
(3) Characters’ Left-Right Placement (Spatial Relationship)
If one person always stays on the left and the other always stays on the right, the audience doesn’t need to recalculate their positions every time the shot changes. As a result, viewers can focus on the dialogue and the emotions.
This principle goes hand in hand with the 30-degree rule. When cutting between shots of the same subject, if the camera angle does not change by at least 30 degrees, the cut can easily look like a jarring jump cut. If the 180-degree rule sets the “fence” within which the camera stays, the 30-degree rule tells you “how far it needs to move” within that fence.
What Happens When You Cross the Line, and Four Ways to Fix It

Cutting directly to a shot taken from the other side of the imaginary line is commonly called “crossing the line.” It creates the illusion that two characters who were facing each other are looking in the same direction, or that a car driving to the right is suddenly heading the opposite way. That said, crossing the line is not forbidden in itself; what is needed is a device that helps the audience follow the change.
[Solution 1] Build a Bridge with a Neutral Shot
A neutral shot taken on the imaginary line itself — such as a shot of a character walking straight toward the camera or moving directly away from it — reveals no left-right direction. Placing such a shot in between greatly reduces the awkwardness, even if the direction changes in the following shot.
[Solution 2] Cross Together with a Camera Move
If you show the camera crossing the line within a single shot, using a dolly or a handheld camera, the audience sees the point of view shift with their own eyes.
[Solution 3] Break the Flow with an Insert or a Cutaway
Slipping in an insert, such as an object held in someone’s hand, or a cutaway that shows something else outside the scene gives the viewer’s spatial memory a brief rest.
[Solution 4] Move the Line Through the Character’s Movement
When a character walks to a new position, the imaginary line moves with them. Once that movement has been shown on screen, you simply set up a new semicircle based on the new line.
Deliberately Crossing the Line, and Pre-Shoot Checks

Break a rule you understand, and it becomes a directorial choice. At moments when a character is thrown into confusion or a relationship is turned upside down, filmmakers sometimes cross the line on purpose to pass a sense of unease on to the audience as well. The Japanese director Yasujirō Ozu is well known for his distinctive spatial compositions, which freely cross the imaginary line. What matters is telling a mistake apart from an intention; a deliberate violation becomes convincing when it is clearly tied to the emotion of the scene.
- Set the line: Before shooting, first establish the imaginary line based on the scene’s main eyelines and movement.
- Floor plan: Mark the positions of the characters and the camera on a simple diagram to confirm that every shot is on the same side.
- Continuity notes: Write down the characters’ eyelines and directions of movement so that shots filmed on other days will match as well.
- Planned crossing: If you are going to cross the line, decide in advance whether to do it with a neutral shot, a camera move, or an insert.
The 180-degree rule is not a shackle that ties down the camera but a promise that lets the audience trust the on-screen space and become immersed in the story. Simply by respecting a single imaginary line, characters in conversation face each other, chases run in one direction, and eyelines find their targets precisely.
The next time you set up your camera, try first drawing an invisible line on the floor. Deciding which side of the line to stand on and sticking with that choice to the end — that is the first step in the visual grammar that keeps the audience from getting lost.